> ## Documentation Index
> Fetch the complete documentation index at: https://stackone-hub-claude-issue-384-20260409-1436.mintlify.site/llms.txt
> Use this file to discover all available pages before exploring further.
# Workday RaaS
> Follow these steps to connect Workday via Report as a Service (RaaS) successfully.
This guidance assumes you have administrative privileges for your Workday account.
## Set Up an Integration System User (Optional)
Setting up an **Integration System User (ISU)** is recommended but optional. You can use an existing Workday user account with appropriate permissions instead.
The key requirement is having valid credentials **(username and password)** with access to create and manage custom reports.
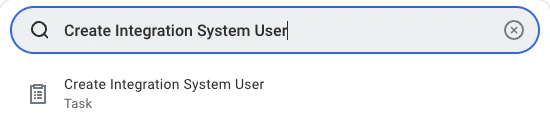
Search for and open the `Create Integration System User` task.
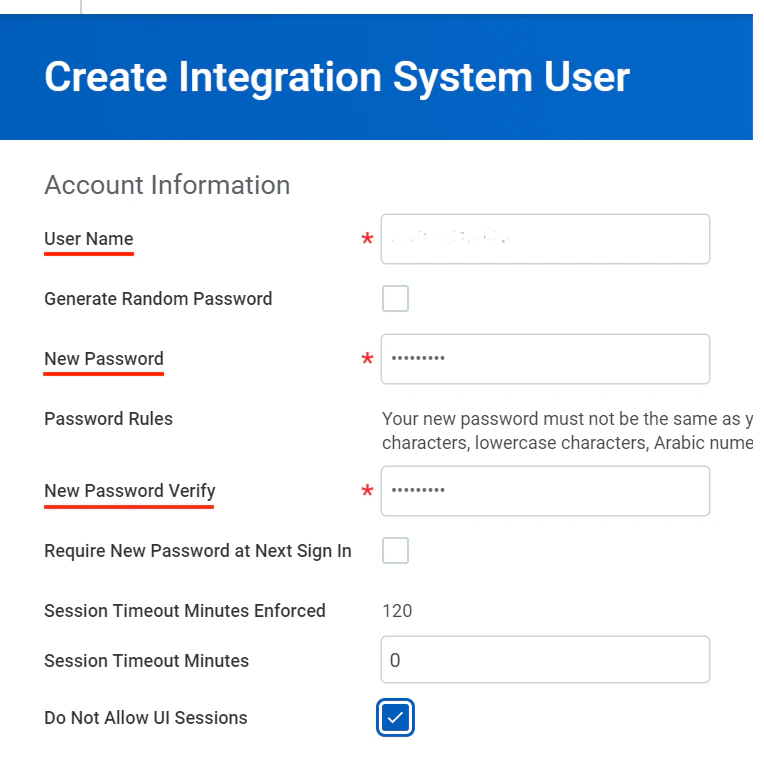
 Enter a username and strong password in the Account Information section, then click `OK` to create the user.
 ## Create and View a Custom Report (Optional)
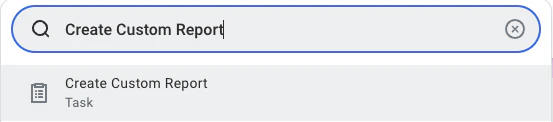
Search and navigate to the `Create Custom Report` task
## Create and View a Custom Report (Optional)
Search and navigate to the `Create Custom Report` task
 Follow the steps below to configure the custom report:
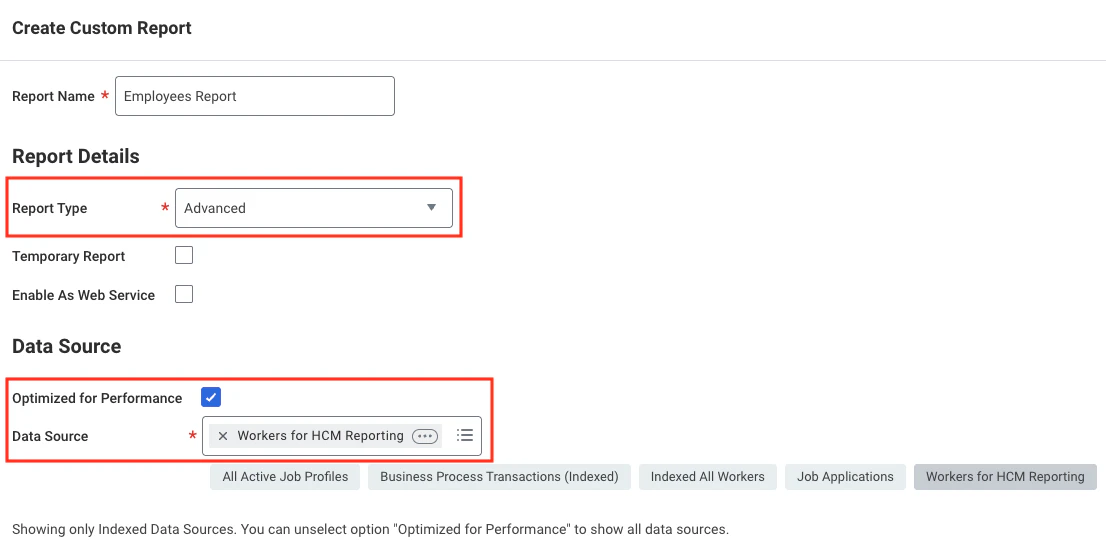
* **Report Name**: Must be unique within the tenant
* **Report Type**: Select **Advanced**
* **Optimised for Performance**: Tick this box to enhance performance
* **Data Source**: Choose the appropriate data source based on the data you need (e.g. Workers for HCM reporting).
Follow the steps below to configure the custom report:
* **Report Name**: Must be unique within the tenant
* **Report Type**: Select **Advanced**
* **Optimised for Performance**: Tick this box to enhance performance
* **Data Source**: Choose the appropriate data source based on the data you need (e.g. Workers for HCM reporting).
 Click `OK` to continue.
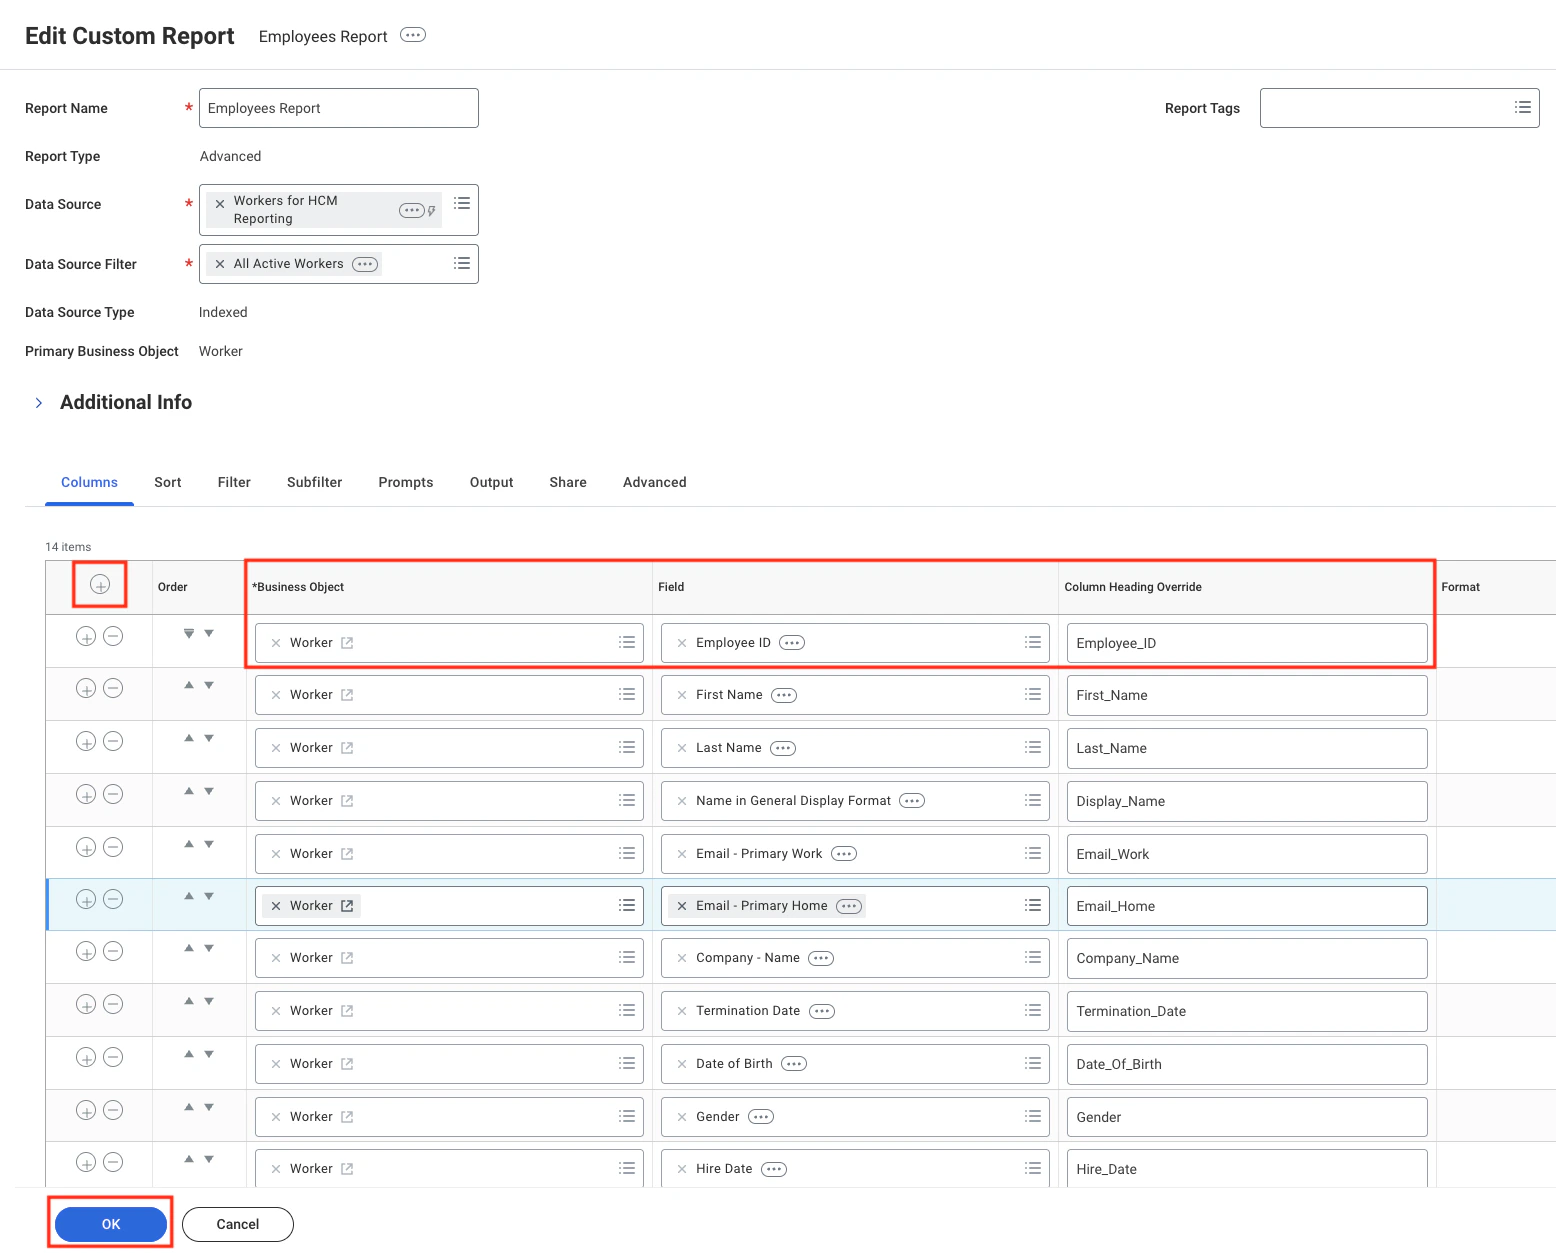
Add and configure report fields:
* Click the `+` icon to add a field.
* Select a Business Object (e.g. Worker) in the **Business Object** column.
* Choose the specific field (e.g. Employee ID) in the **Field** column.
* Set aliases in **Column Heading Override** and **Column Heading Override XML Alias** to ensure stable field names in API responses.
For employee data, you can include the following fields:
* Employee\_ID
* First\_Name
* Last\_Name
* Display\_Name
* Email\_Work
* Email\_Home
* Phone\_Work
* Phone\_Home
* Job\_Title
* Hire\_Date
* Gender
* Date\_Of\_Birth
* Termination\_Date
* Company\_Name
Click `OK` to continue.
Add and configure report fields:
* Click the `+` icon to add a field.
* Select a Business Object (e.g. Worker) in the **Business Object** column.
* Choose the specific field (e.g. Employee ID) in the **Field** column.
* Set aliases in **Column Heading Override** and **Column Heading Override XML Alias** to ensure stable field names in API responses.
For employee data, you can include the following fields:
* Employee\_ID
* First\_Name
* Last\_Name
* Display\_Name
* Email\_Work
* Email\_Home
* Phone\_Work
* Phone\_Home
* Job\_Title
* Hire\_Date
* Gender
* Date\_Of\_Birth
* Termination\_Date
* Company\_Name
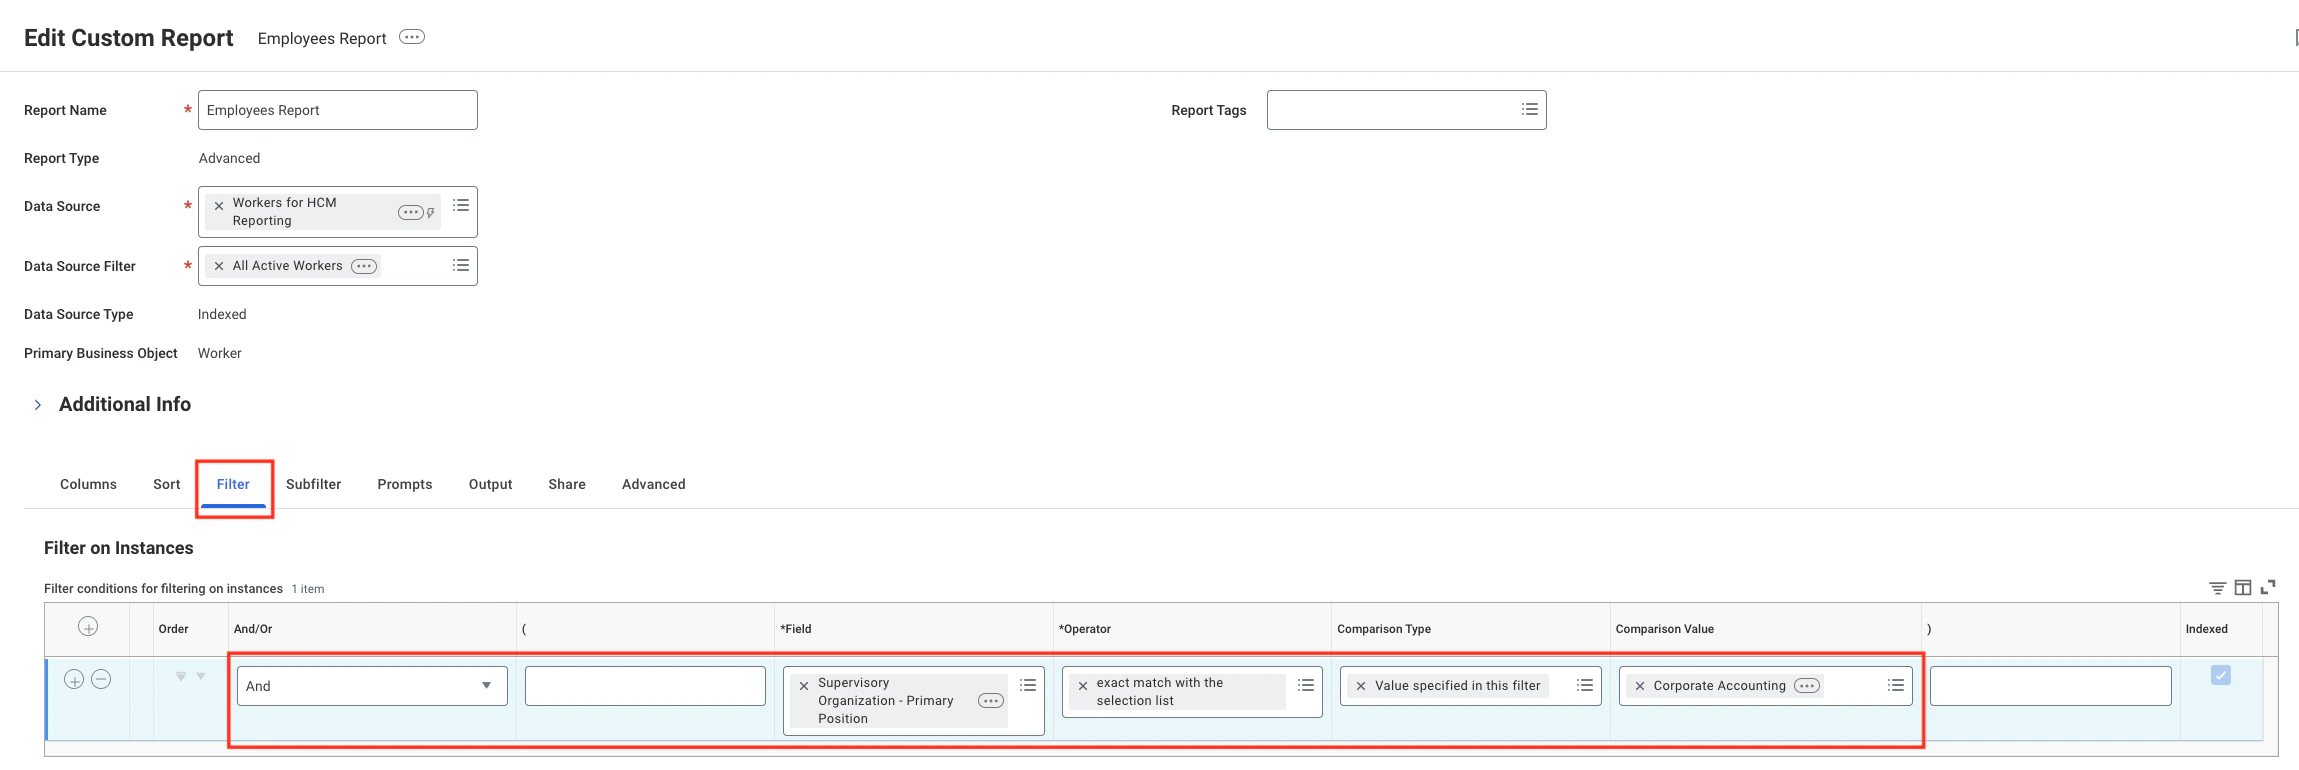
 Add filters to narrow the result data set (e.g. Supervisory Organisation – Primary Position).
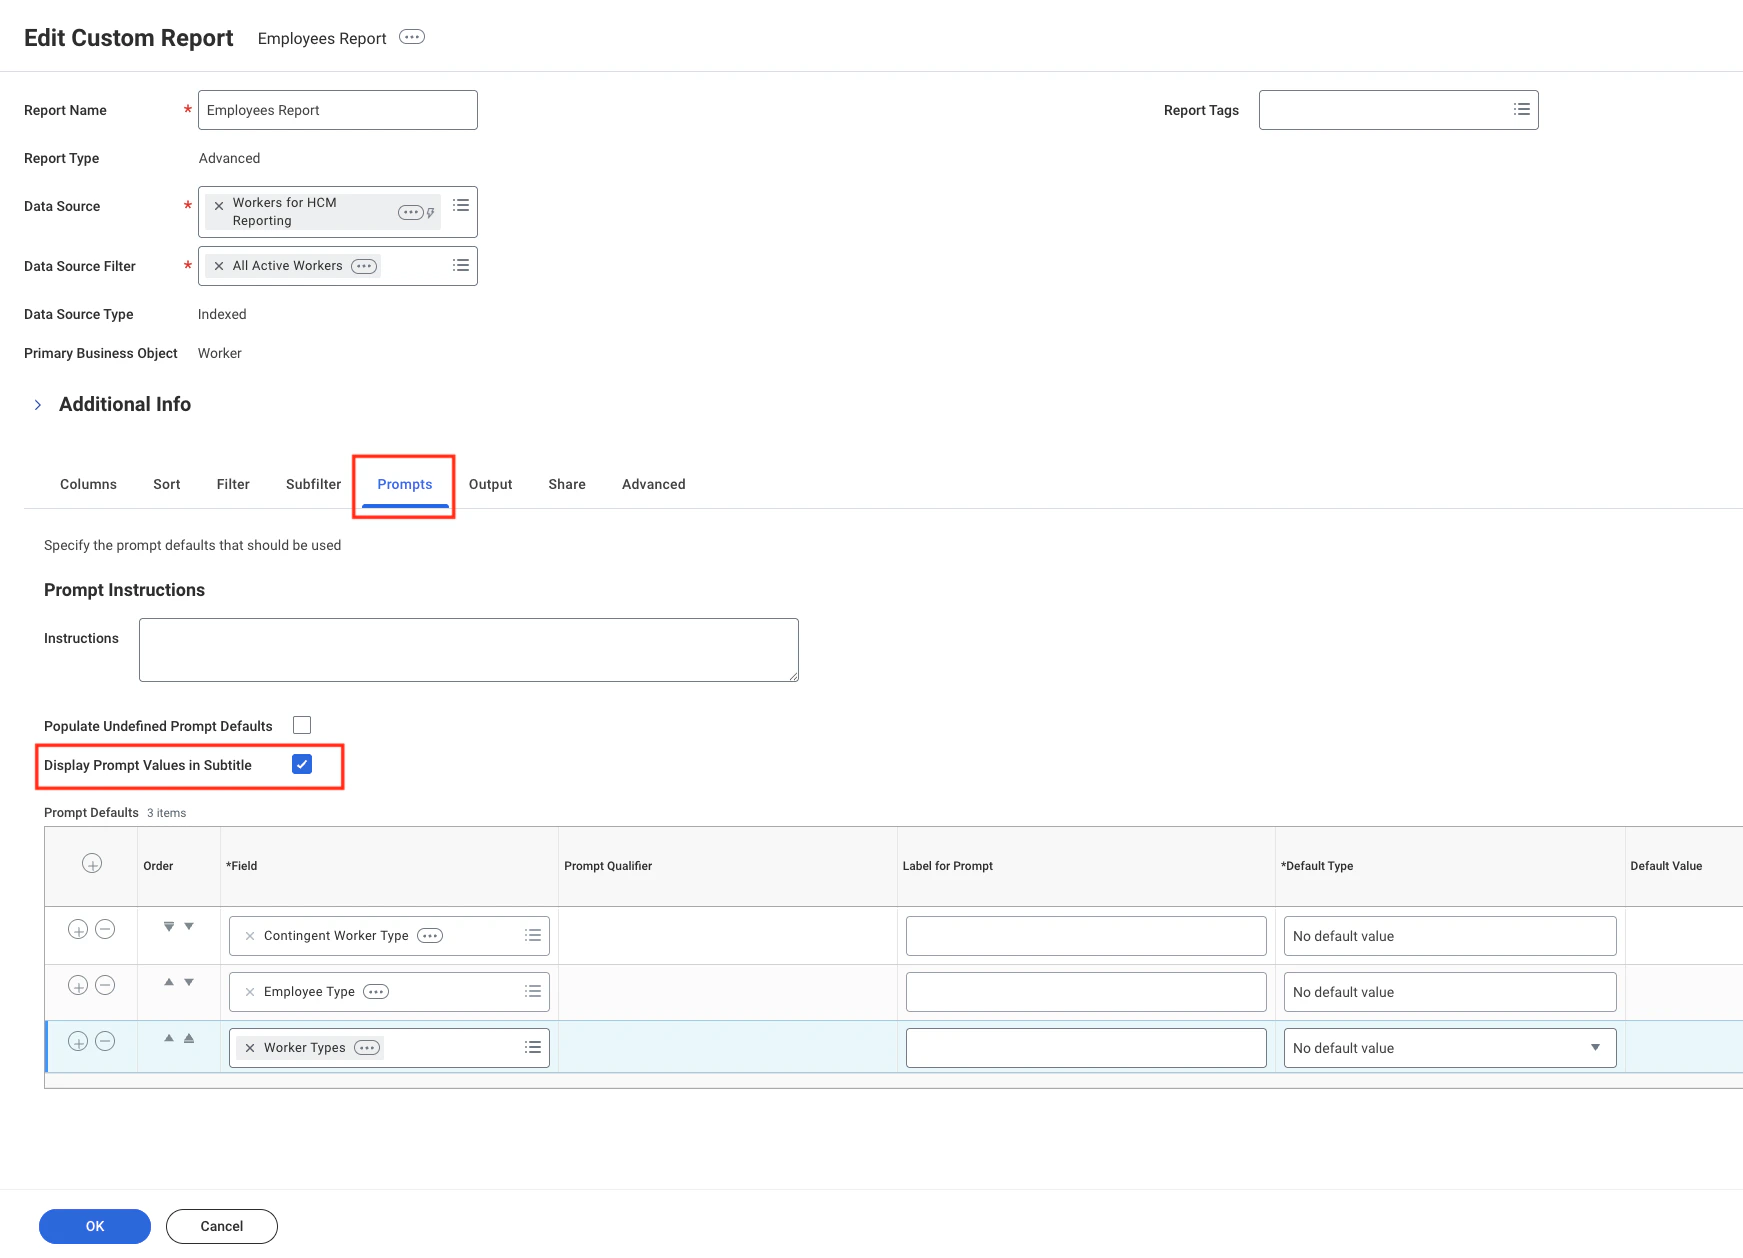
 Enable prompt display by ticking **Display Prompt Values in Subtitle**. Leave other settings at their defaults.
 Tick **Optimised for Performance** and **Enable As Web Service**. Leave other advanced options unchanged.
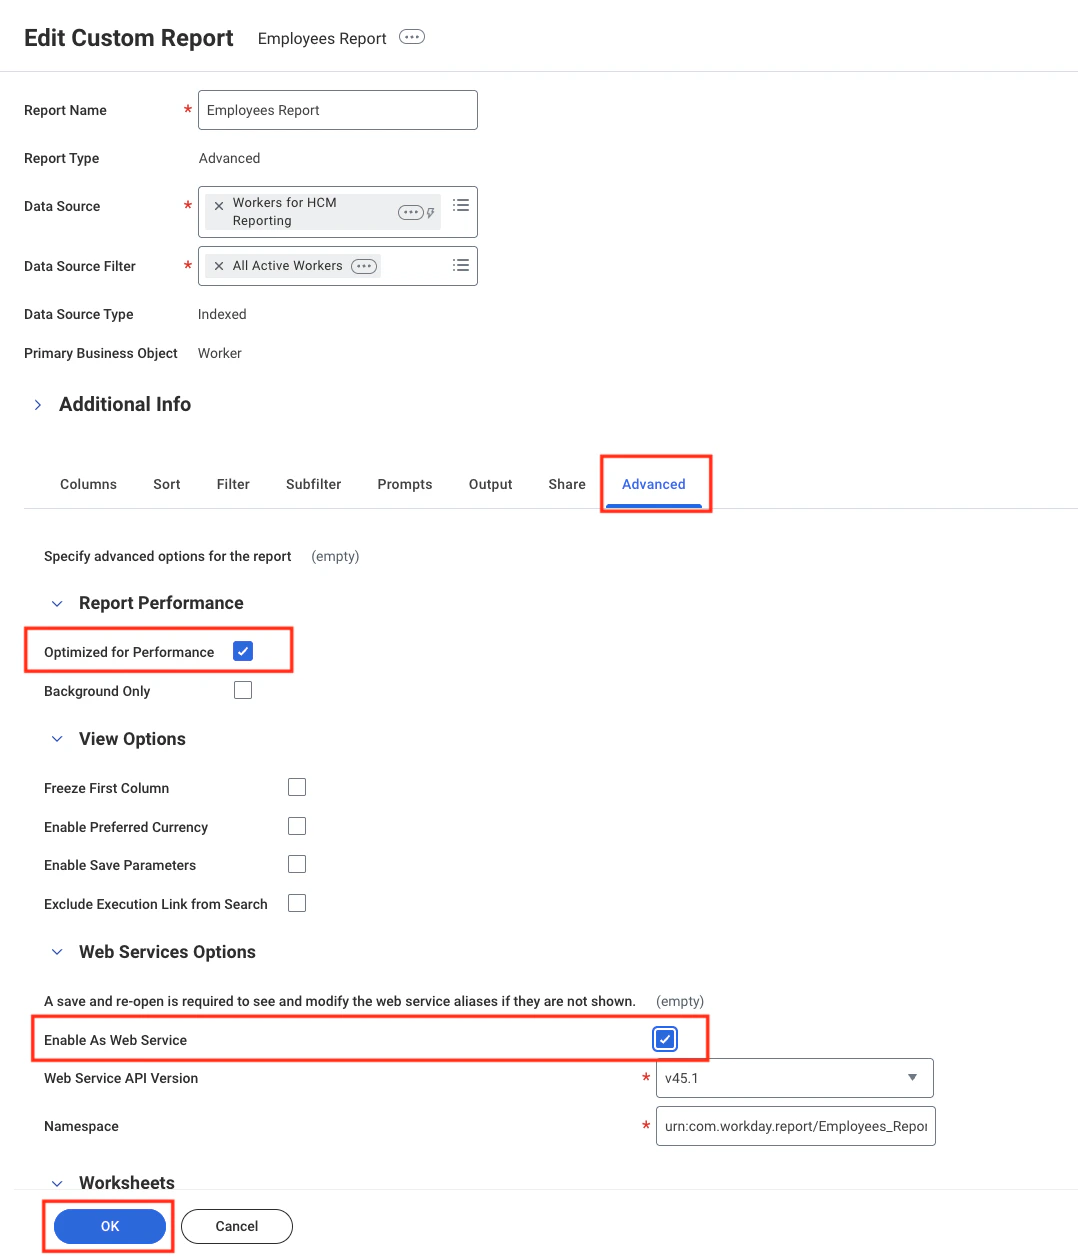 Click `OK` to save the report.
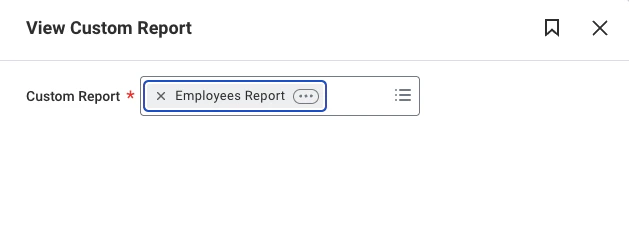
Search for `View Custom Report`, select the report you just created, then click `OK` to open it.
Click `OK` to save the report.
Search for `View Custom Report`, select the report you just created, then click `OK` to open it.
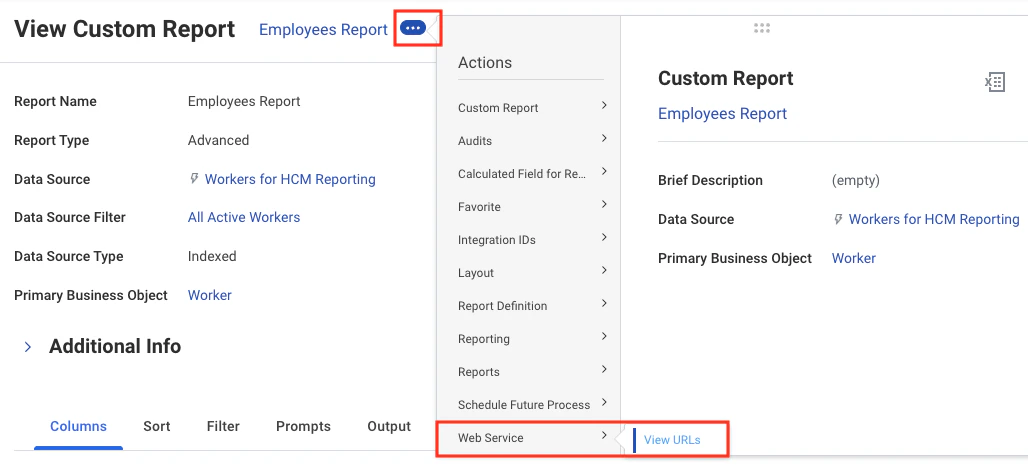
 Open the three‑dot menu, select *Web Service* > *View URLs*; you will be redirected to the **View URLs Web Service** page.
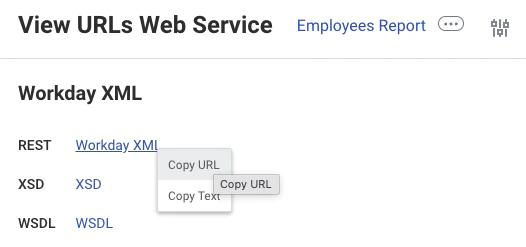
 Right‑click the **Workday XML** link and copy its URL.
 ## Connecting to StackOne
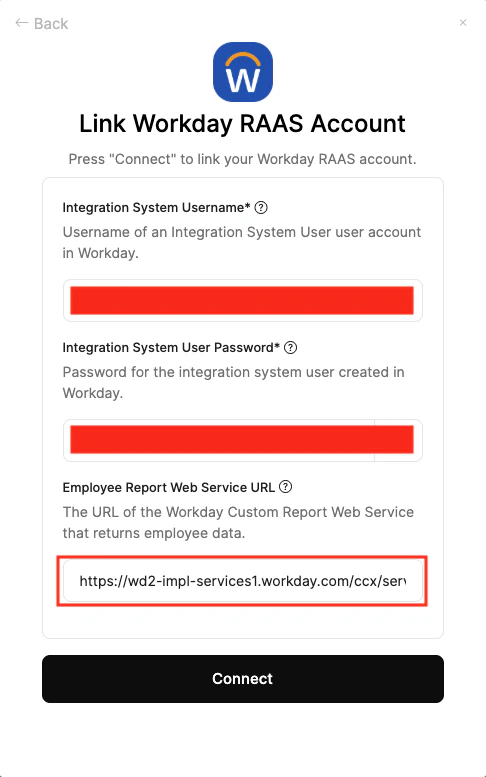
Use the **ISU Username**, **ISU Password**, and **Report URL** to create a connection.
## Connecting to StackOne
Use the **ISU Username**, **ISU Password**, and **Report URL** to create a connection.
 If you are encountering issues after connecting and calling the unified **List Employees** endpoint, you can visit [Integration Configuration & Concepts guide of Workday RaaS](https://hub.stackone.com/integration-configuration-concepts/hris/workday-raas)
## Useful Links
[https://community.workday.com](https://community.workday.com)
If you are encountering issues after connecting and calling the unified **List Employees** endpoint, you can visit [Integration Configuration & Concepts guide of Workday RaaS](https://hub.stackone.com/integration-configuration-concepts/hris/workday-raas)
## Useful Links
[https://community.workday.com](https://community.workday.com)