> ## Documentation Index
> Fetch the complete documentation index at: https://stackone-hub-claude-issue-384-20260409-1436.mintlify.site/llms.txt
> Use this file to discover all available pages before exploring further.
# Eploy
> Follow these steps to connect Eploy with StackOne Hub successfully.
Ensure you have Admin privileges for your Eploy account.
If you've been directed to StackOne to integrate with Eploy, the following steps will help you understand the process and any necessary actions to configure successful integration.
## Getting your Subdomain
You can find the subdomain in the URL of your Eploy account by taking the portion that appears before `.eploy.net` and after `https://`.
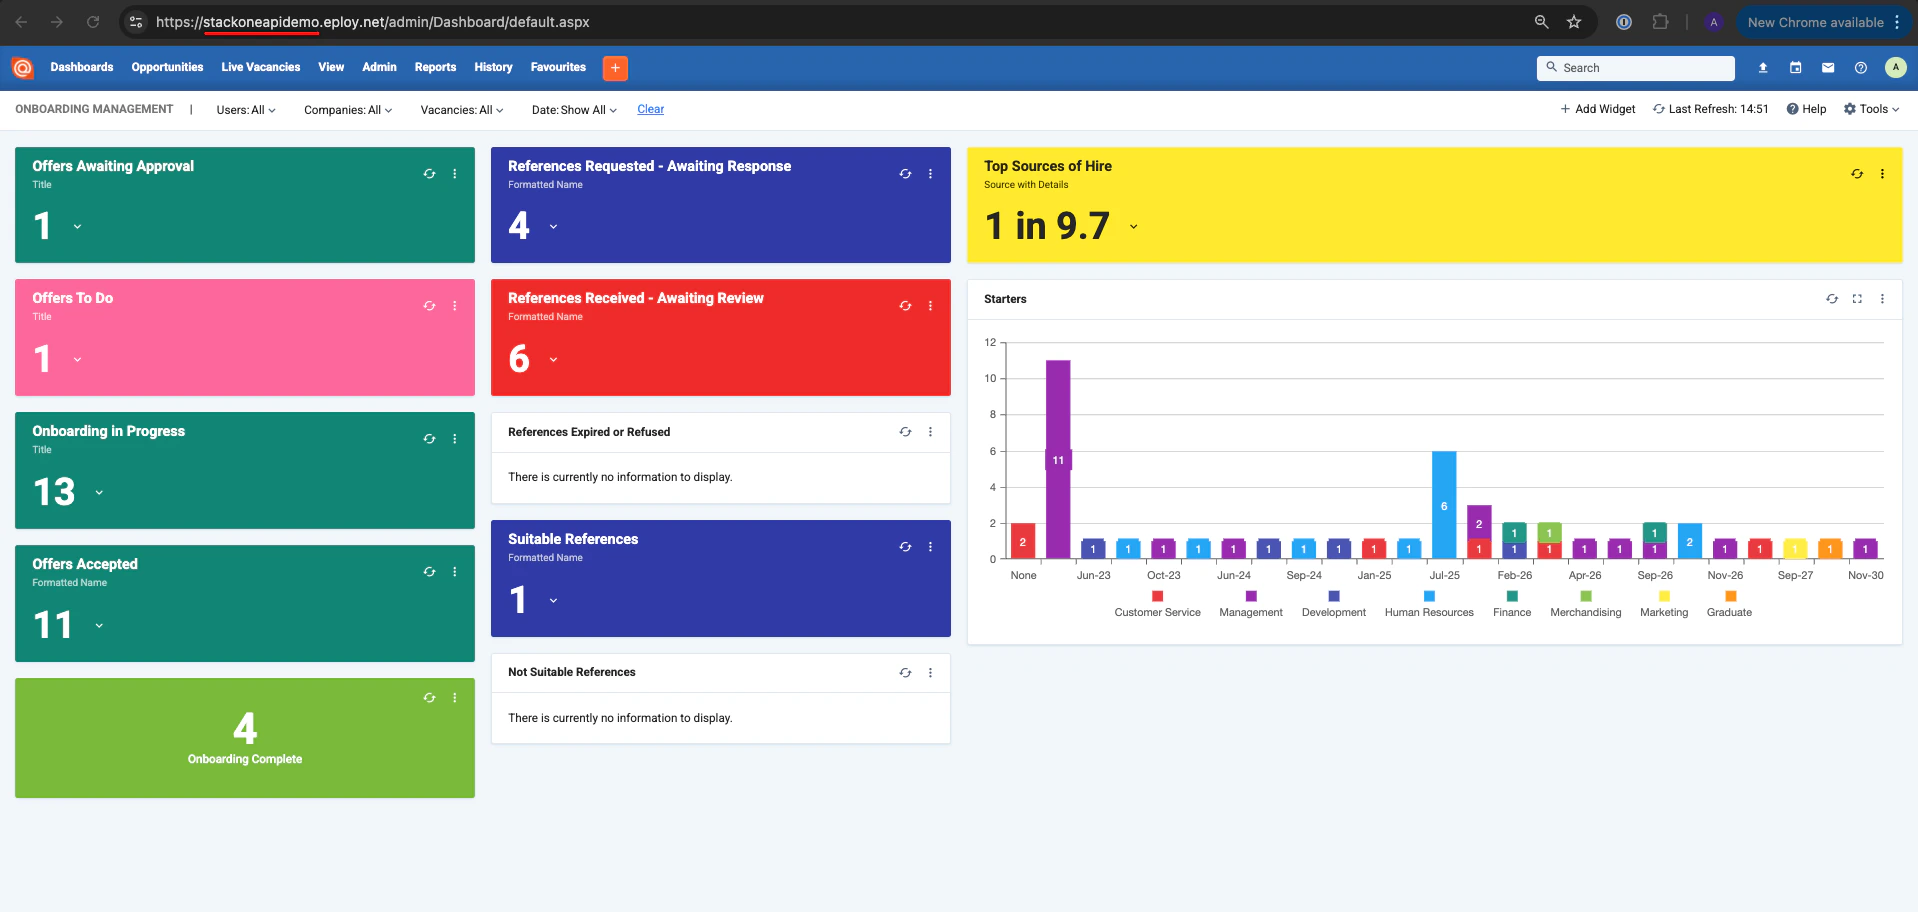 In this example, the value would be: stackoneapidemo
## Generating Client Id and Client Secret
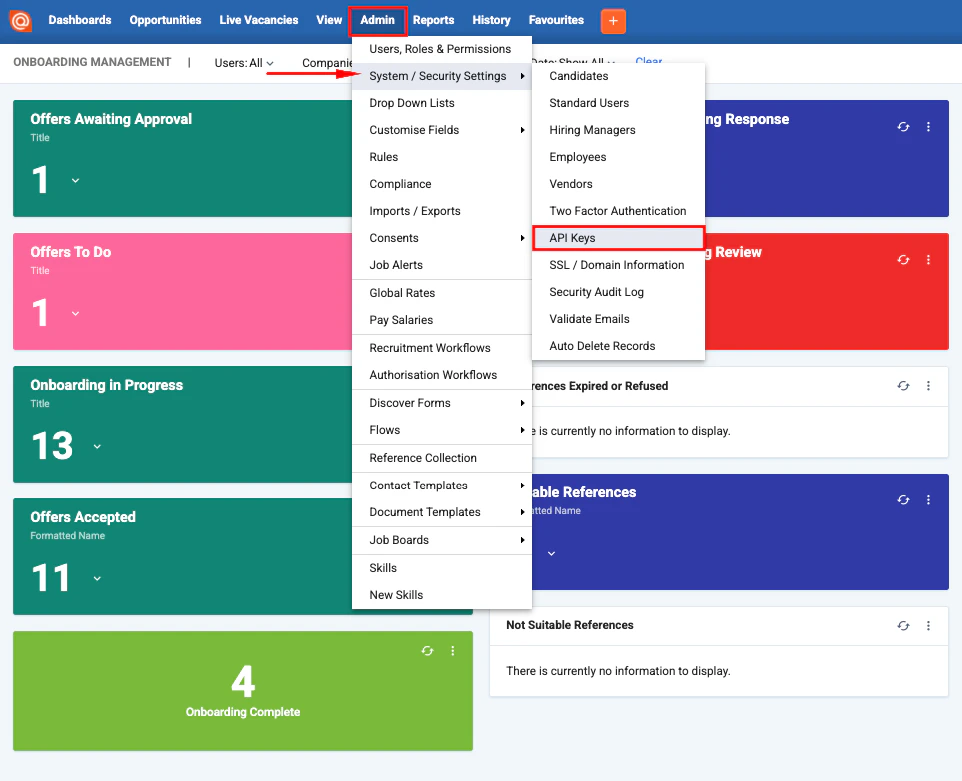
In the top navigation bar go to `Admin` → `System / Security Settings` → `API Keys`.
In this example, the value would be: stackoneapidemo
## Generating Client Id and Client Secret
In the top navigation bar go to `Admin` → `System / Security Settings` → `API Keys`.
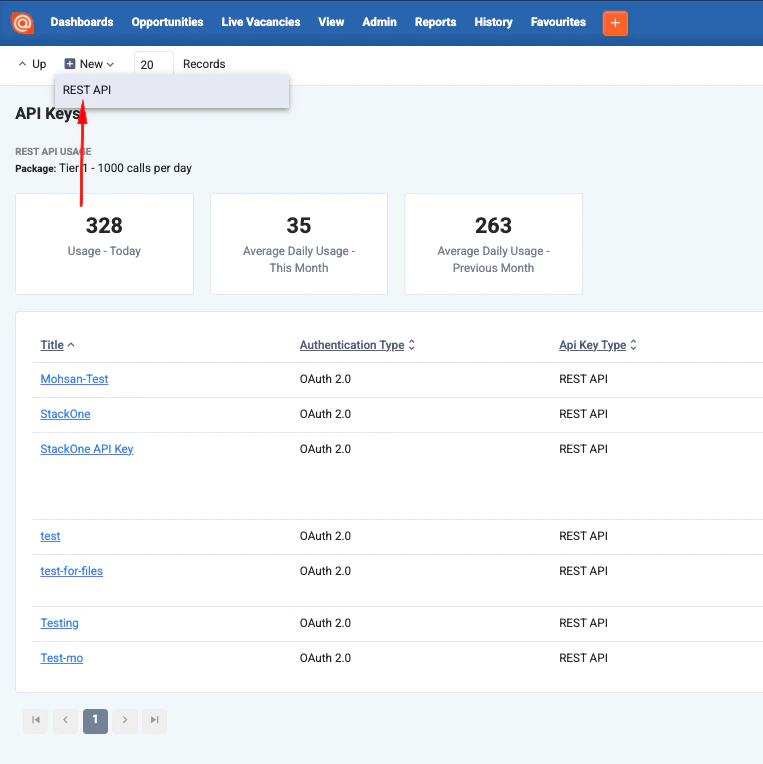
 On the top-right select `New` → `Rest API`.
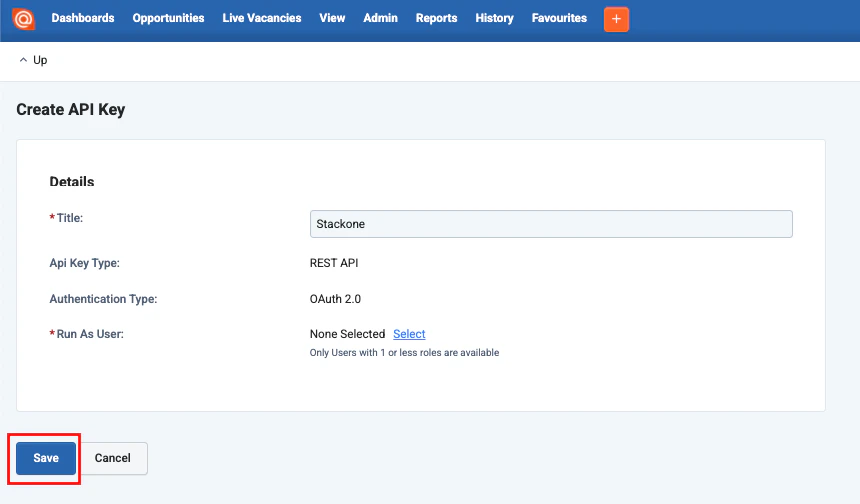
 Enter `title` for the API Key, for example: `StackOne`.
Select an `API User` for your API Key to use and click `Save`.
Enter `title` for the API Key, for example: `StackOne`.
Select an `API User` for your API Key to use and click `Save`.
 Your `Client ID` and `Client Secret` will be generated and displayed to you. Copy them to a safe place.
Assign API permissions based on the integration requirements by clicking on `Add` button.
Your `Client ID` and `Client Secret` will be generated and displayed to you. Copy them to a safe place.
Assign API permissions based on the integration requirements by clicking on `Add` button.
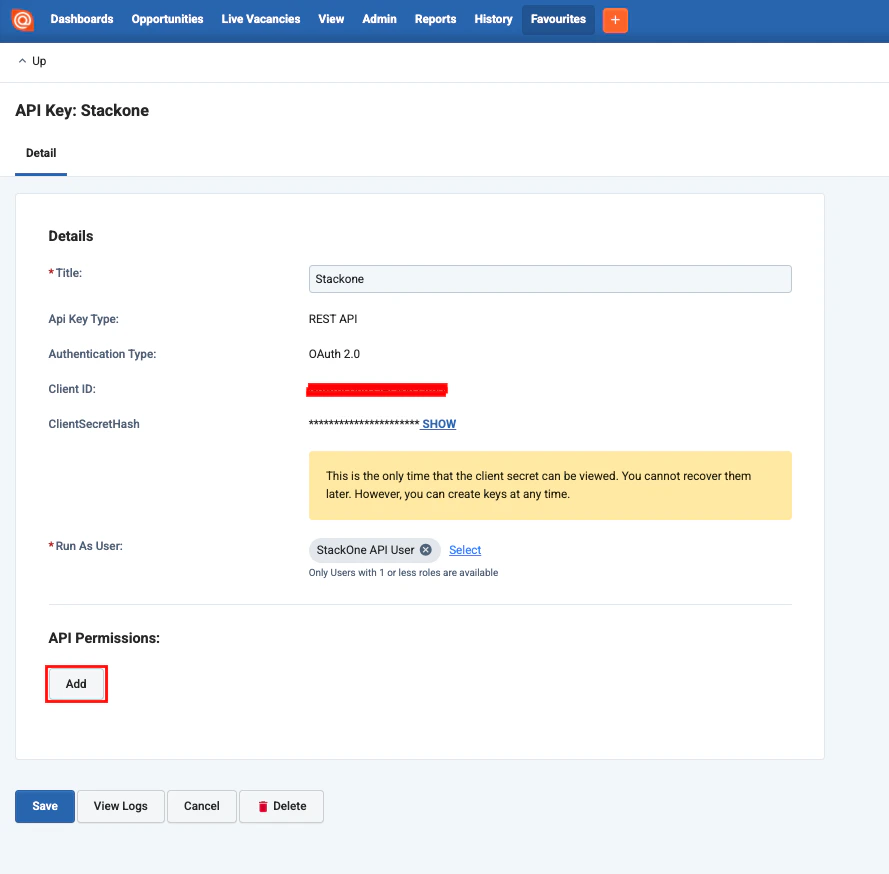 Select and enable each of the API permissions below used in this integration, and click `Save` for each.
* **Actions**
* Insert
* View
* Update
* **Applications**
* Insert
* View
* Update
* **Candidates**
* Insert
* View
* Update
* **Companies**
* Insert
* View
* Update
* **Contacts**
* Insert
* View
* Update
* **Export**
* View
* Insert
* **Files**
* View
* **Pay Rates**
* View
* **Pay Salaries**
* View
* **Placements**
* Insert
* View
* Update
* **Purchase Orders**
* View
* **Timesheets**
* Insert
* View
* Update
* **Users**
* Insert
* View
* Update
* **Vacancies**
* Insert
* View
* Update
* **Vacancy Templates**
* View
* **Workflows**
* View
Select and enable each of the API permissions below used in this integration, and click `Save` for each.
* **Actions**
* Insert
* View
* Update
* **Applications**
* Insert
* View
* Update
* **Candidates**
* Insert
* View
* Update
* **Companies**
* Insert
* View
* Update
* **Contacts**
* Insert
* View
* Update
* **Export**
* View
* Insert
* **Files**
* View
* **Pay Rates**
* View
* **Pay Salaries**
* View
* **Placements**
* Insert
* View
* Update
* **Purchase Orders**
* View
* **Timesheets**
* Insert
* View
* Update
* **Users**
* Insert
* View
* Update
* **Vacancies**
* Insert
* View
* Update
* **Vacancy Templates**
* View
* **Workflows**
* View
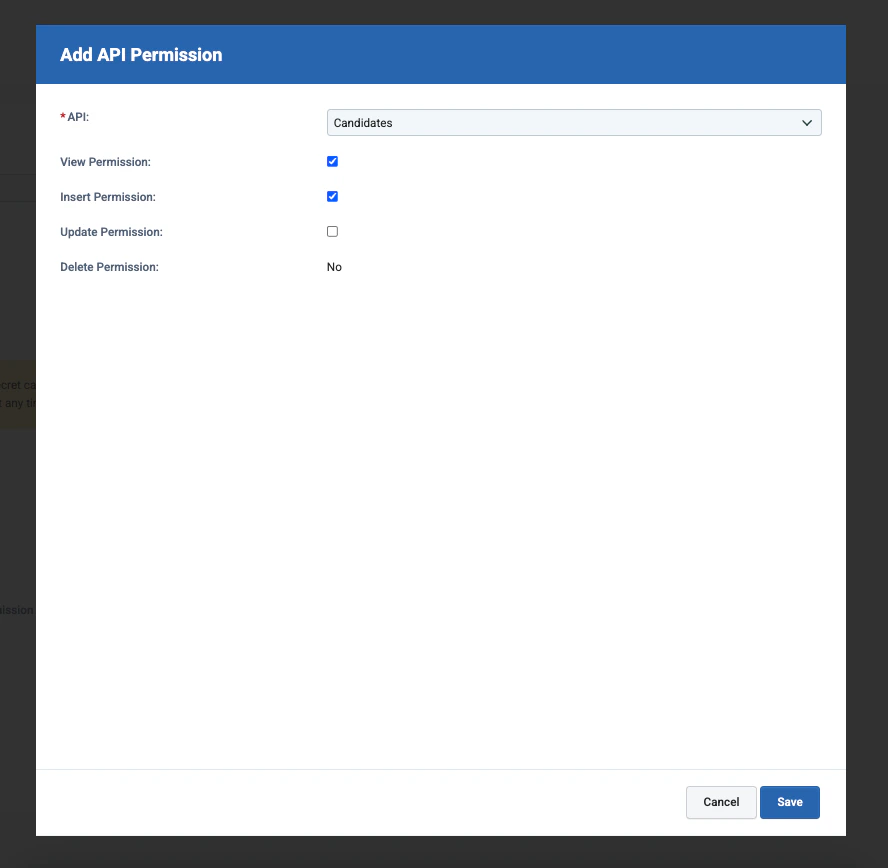 Click `Save`.
## Connecting with StackOne
Upon reaching the Link Account page, enter the `Subdomain`, `Client ID`, and `Client Secret` gathered from the steps above.
Enter `scopes` to optionally restrict this API key's access.
Only the scopes assigned above during API key configuration will be allowed — see the full list here.
Click `Save`.
## Connecting with StackOne
Upon reaching the Link Account page, enter the `Subdomain`, `Client ID`, and `Client Secret` gathered from the steps above.
Enter `scopes` to optionally restrict this API key's access.
Only the scopes assigned above during API key configuration will be allowed — see the full list here.
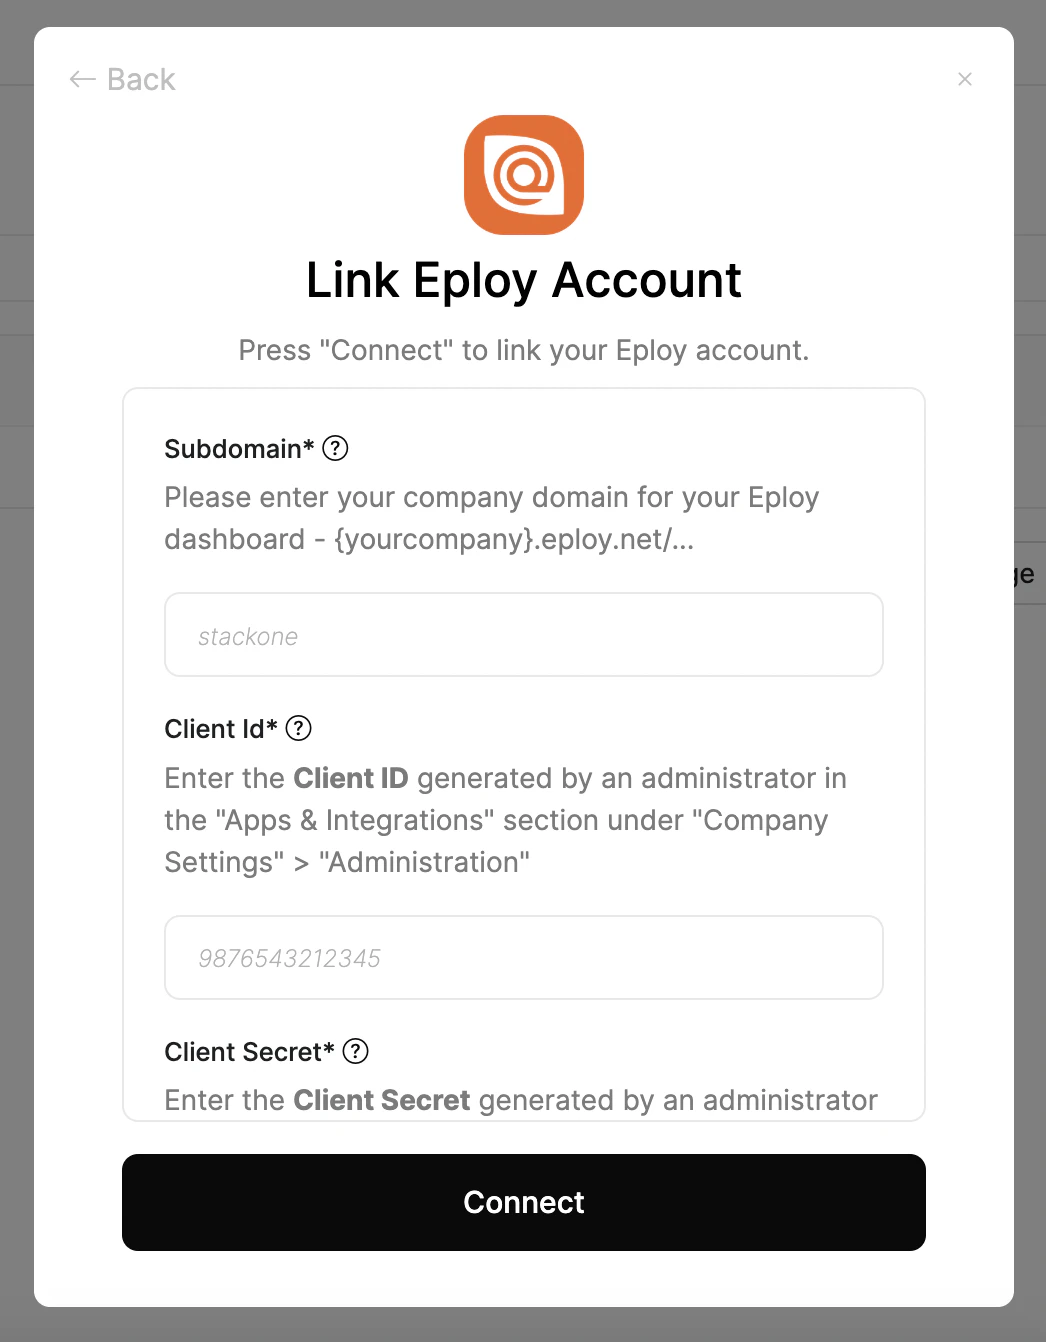
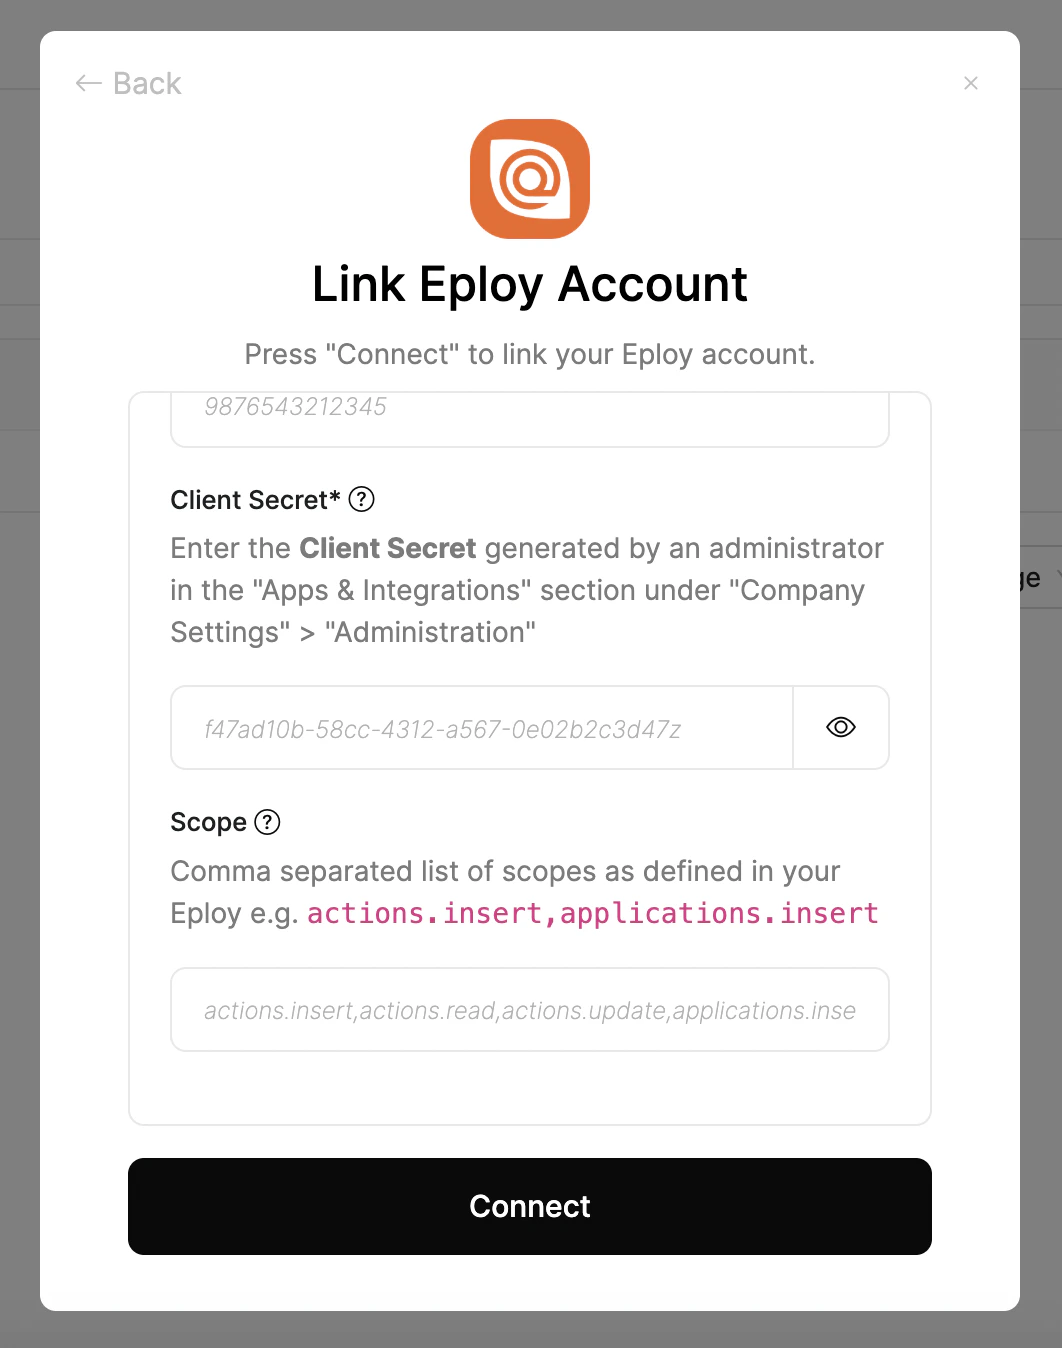 Click `Connect`.
Congratulations, you're all set! If you face any issues with the steps mentioned above,
please contact us by emailing [integrations@stackone.com](mailto:integrations@stackone.com). We're always here to assist you!
## Useful Links
[https://support.eploy.co.uk/hc/en-gb/categories/14740107974941-Eploy-RESTful-API](https://support.eploy.co.uk/hc/en-gb/categories/14740107974941-Eploy-RESTful-API)